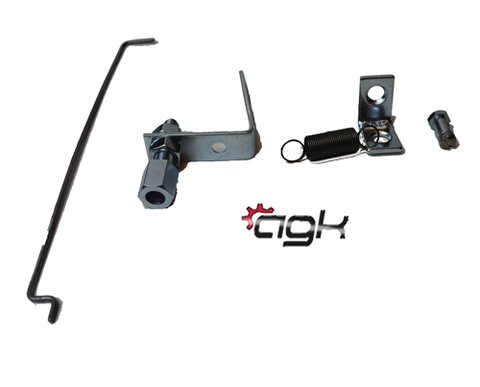
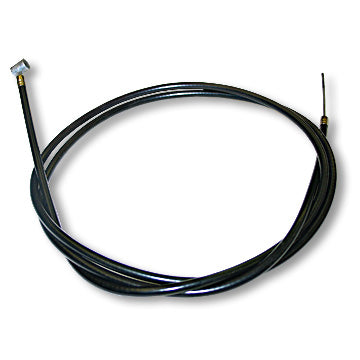
Throttle Linkage Kit & Instructions
This page a few possibilities for your throttle linkage setup. The first series of pictures shows the installation of our
throttle linkage kit.
The second series of pictures shows a linkage you can fabricate when the govenor has been removed along with the stock
fuel tank and air filter box. Check out both throttle linkage designs to see which fits your needs the best.

For the sake of this article, we'll call this the throttle lever and throttle plate.

The stock throttle rod is shown on top and pictured on the bottom is a throttle rod that has been modified for this
kit. If you plan to keep the govenor in the engine you will not need this short throttle rod we supply. Only use
the short throttle rod for engines that have the govenor removed.

Start by installing the modified throttle rod into the
throttle lever. There is a small tab on the throttle lever which
is bent downward and already has a hole for the throttle rod to fit
into. You do not need to remove the throttle plate to do this. Skip this step if your engine has the govenor. You can keep the stock throttle rod attached.

With a pair of needle nose pliers you can install the
opposite end of the throttle rod into the carburetor. Again, this step can be skipped if your engine has the govenor. You will keep the stock throttle rod in place. Only use the short throttle rod for engines with the govenor removed.

Now you can install the "L" shaped bracket for the
return spring. This bracket is secured by the bolt that holds the
front of the throttle plate in place.

Next install the the "L" shaped bracket which holds the
conduit retainer. If you are going to use the stock air box on
your engine, you will need to mount this bracket underneath the throttle
plate (as pictured) in order for the top of the bracket to clear the air
box.

Now install the conduit retainer onto the "L" shaped
bracket. Position the jam nuts in a way that will allow you
adjustment forward or back if needed.

Install the throttle cable into the conduit retainer.

The swivel wire stop fits nicely in the throttle lever.
You don't need to remove the throttle plate. Hold the swivel wire
stop in place with one hand while you thread the throttle cable into it
with the other hand.

Throttle cable installed.

Install the return spring. Use needle nose pliers
to hook the spring on the "L" shaped bracket and the tab on the throttle
lever. Then twist the ends of the spring with the needle nose
pliers to ensure the spring cannot come off.

Your throttle kit is now installed.

Check your throttle to make sure the return spring
closes the throttle lever completely. Ours did not even want to
open until we loosened the nut that secures the throttle lever to the
throttle plate.

Once we were able to open the throttle we realized it
did not close all the way because the throttle lever was hitting the
adjustment screw on the throttle plate. Using the needle nose
pliers we bent the adjustment screw tab upward slightly.

With those two minor adjustments our throttle linkage
was working beautifully!

This throttle linkage kit fits nicely under the stock air filter box.
The following information shows you how to create a simple
yet effective throttle linkage for little to no money. This system
works best when the stock air filter box and fuel tank have been removed
along with the govenor removal.

The picture to the left shows the basic design we use
to create a simple and efficient throttle linkage. We
have a throttle rod on the left which is connected to the carburetor.
The pivot arm in the middle is bolted to the fan shroud with
a nylon spacer in between. The throttle rod and return
spring are connected to the pivot arm on one side and on the
opposite of the pivot arm is the throttle cable.

When the govenor is removed from your engine, you no
longer need the hand throttle setup. We remove the entire
hand throttle assembly. Save the parts because you will
use some of them to make a new throttle setup.

Here are the parts we use to make our own throttle
linkage. The three parts on the left are from the original
throttle system. The parts on the right can be purchased
at most hardware stores for a couple dollars. Or you can
use our throttle linkage kit in conjunction with this do-it-yourself
linkage system.

We put the stock throttle rod into the carburetor first.
This helps us determine where to place the pivot arm on the
fan shroud. The stock pivot arm has been cut on the side
where the nut and bolt was originally located. We use
the small hole on the opposite side of the pivot arm for the
throttle rod and return spring. After the pivot arm is
in place you can find a good location for the throttle cable
mount.

There are many ways to setup your throttle. We
hope this information gives you a good idea of how you can create
your own inexpensive, easy and effective throttle linkage.
Completed Throttle Linkages: