 |
You will remove the cylinder head first. Start by placing the piston at top dead center (TDC). To do this, remove the spark plug so you can see the piston. Turn the engine over until the piston is at the top of the cylinder (nearest the spark plug hole). This is TDC. Remove the four bolts holding the cylinder head in place. Notice two of the bolts are located under the valve cover. With the cylinder head off, remove the engine side cover for access to the rod. |
|

|
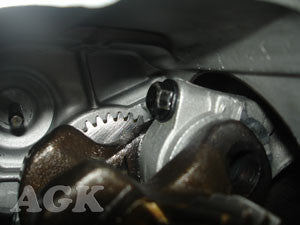
Remove the two 10mm bolts that are holding the rod end cap in place. |
 |
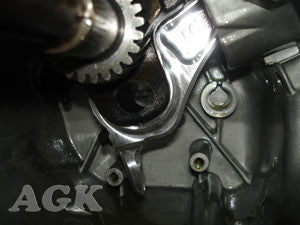
Push the rod and piston up, through the top of the cylinder. |
 |
Remove the end cap bolts from the billet rod. The factory torques these bolts so we had to place the rod in vice, with a rag. This allowed us to get some leverage and break the bolts loose. |
 |
With a pair of needle nose pliers, install a "C" clip on one side of your flat top piston. Lightly oil the wrist pin and install it through the other side of the piston and through the billet rod. Now install the second "C" clip into the piston. Note: the piston should be positioned with the arrow closest to the pushrod hole. |
|


|
Place the bearings in the rod and rod end cap. Make sure the holes in the bearings match up with the oil holes in the rod and end cap. Apply some oil or assembly lube to the bearings. |
 |
Install the rod and piston into the cylinder. A popsicle stick works great for pressing the rings into the cylinder (if you don't have a ring compressor). Make sure the crank journal is clean and lined up with the rod end before the piston is all the way into the cylinder. |
 |
Once the piston is all the way into the cylinder and the rod end is positioned firmly against the crankshaft journal, install the rod end cap. Turn the bolts down finger tight. Torque the bolts according to the manufacturers recommendations. |
 |
After the rod is installed, rotate the crank and make sure the rod does not come into contact with anything. We have never had a problem with rod clearance, but you should always check. If there is a problem, this is the best time to find out. Make sure the crank case is clean and reassemble your engine. |


